This is a comprehensive guide to broiler brooding best management practices for poultry farmers.
So, if you want to learn all about brooder management – including:
- Key parameters for early chick performance
- How to set up the brooder barn (for best results!)
- Biosecurity for brooding
- Recordkeeping metrics for controlling targeted weight gain
Then this tutorial is all for you.
A bit about our tutor, Scott…
Today’s article takes the form of an in-depth tutorial by Dr. Scott Gillingham, Canadian Regional Business Consultant for Aviagen.

Before I present today’s guide on broiler brooding best management practices,
(I highly recommend finding out a bit more about Scott and his background that led to his passion for day-old chicks…
This profile on Canadian Poultry Mag is definitely worth a read:
https://www.canadianpoultrymag.com/scott-gillingham-31059/ )
Here are a few quotes taken from the article linked above, direct from Scott and about him indirectly:
“In 2000, Gillingham became the first poultry health management lead for the Ontario Ministry of Agriculture, Food and Rural Affairs. Through this position he was able to serve the Ontario poultry industry through veterinary science, technology transfer, outbreak investigation and poultry health surveillance.”
“His job is to make sure that the genetic potential of the birds isn’t left on the floor of the barn.”
“…he’ll tell you that, in the 9,000 km across this country with 2,850 broiler farmers, there are 2,850 ways to grow chicken.”
(Source: Canadian Poultry Magazine)
The link between brooder management best practices and farm results
As you’ll see from the quotes above and the guide below, Scott is BIG on standards and uniformity.
In a words,
‘Discipline‘.
Why?
Because it is the KEY factor for poultry farming success.
This is the #1 message he has both demonstrated and taught throughout his decades in the industry.
But beyond that, Scott has demonstrated lots of heart for the world’s poultry farming community.
Most of all, those of us in the “start-up”, “beginner“, “newbie” or “small guy” category.
For example, Scott and his wife (who was born in the Dominican Republic) “…recently sponsored a farmer in Zimbabwe to start his own poultry farm.” (Source: Canadian Poultry Magazine)
So, that’s Dr. Scott’s contribution to poultry in an eggshell…
…and if you must sum up Scott’s care for chicken, Director of Operations at Boire & Freres, Francois Duguay puts it this way:
“Day-old chicks are Scott’s [his] passion.” (Source: Canadian Poultry Magazine)
And talking of day-old chicks, it’s with pleasure that I’d like to share with you this expert presentation and demonstration of ‘Brooder Management Best Practices: Early Chick Performance.”
The video was produced by The Chicken Farmers of Ontario and hosted on the grounds of one of their broiler member farms.
So, here it is – the video in full length is 17 minutes long and I’ve included summary snippets below:
VIDEO – Broiler Brooding Best Management Practice: Early Chick Performance
Highlights from the video
Introduction to Broiler Brooding Best Management Practices by Scott Gillingham

1. Location
We’re on location with Dr. Scott Gillingham and his team on a broiler farm site in Ontario, Canada.
They are preparing the brooder barn in expectation of receiving a new batch of broiler chicks.
(P.S. …it looks really cold!)

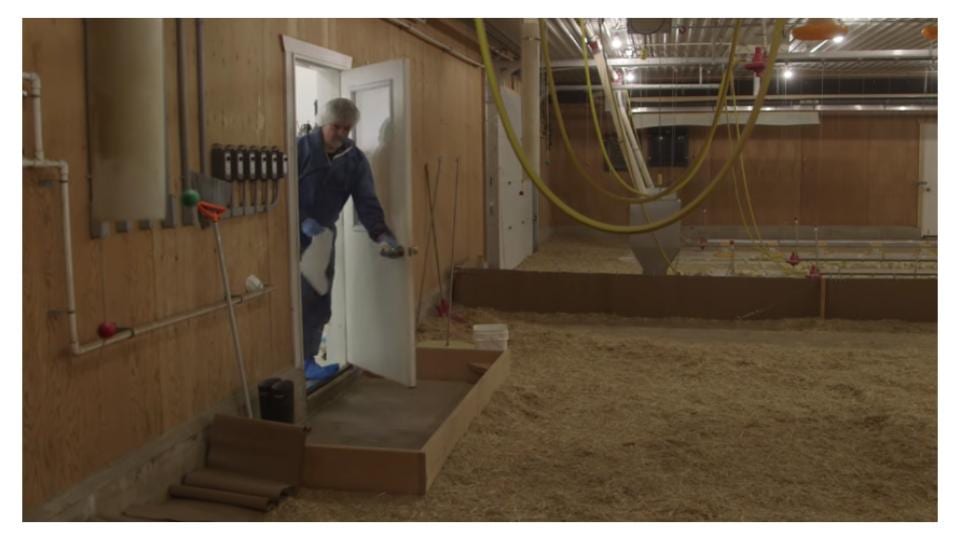
Scott and his team land and get straight to work.
2. On-site policy…the guests sign in
According to sound biosecurity managerial practice, the broiler farm ensures Scott an co. sign in on arrival.

Dr. Scott Gillingham is a stickler for the rules and knows the ‘profit-protecting’ importance of strict biosecurity.
3. Scott travels across Ontario to help the farmers protect their yield from day 1
Scott covers a territory from New Foundland to British Columbia – helping approximately 11,000 poultry farmer raise their meat birds successfully.
It is said, “Doc Scott has logged over a million miles on airplanes.” (Source: Canadian Poultry Magazine)
4. Broiler farm biosecurity
So, aside from good nutrition – Scott recommends reducing what he terms as that, “…wave of insult.”
In other words, the background threat of bacterial and viral infection.

Coveralls, gloves, head net and boot bags are a staple for him on his travels.

Also, of course, hand sanitisation before handling any chicks.
5. Now, you’re going to learn about the optimal brooder barn set-up
Scott is about to take you through a comprehensive tutorial of how to set up your brooder barn before your chicks arrive.
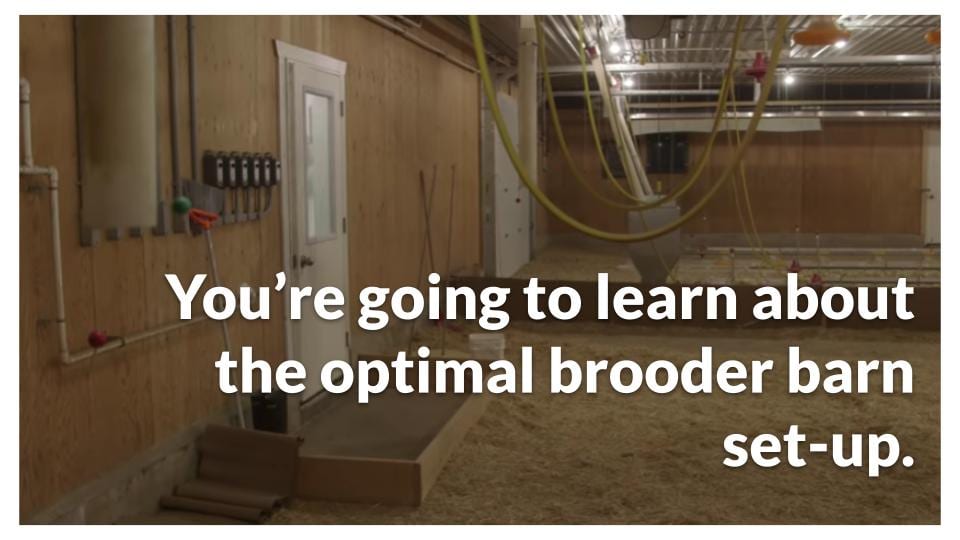
Enter, Scott Gillingham…
5. Brooding parameter and standards
Now, Scott says, “…brooder barn dynamics are so important.”

Why?
It impacts the development of the immune system, gastrointestinal formation and the growth of the flock throughout the entire production cycle.
It has a great influence on the outcome of poultry farm profit.
And with 11,000 farmers on his patch in Ontario, he claims that there are also 11,000 ways to raise birds.
His job is to bring them all to standard and yield optimal results – every time.
Here’s how…
6. An integrated approach, joined-up thinking
“You don’t just want to inspect”, says Scott, “…you want an integrated kind of attitude.”
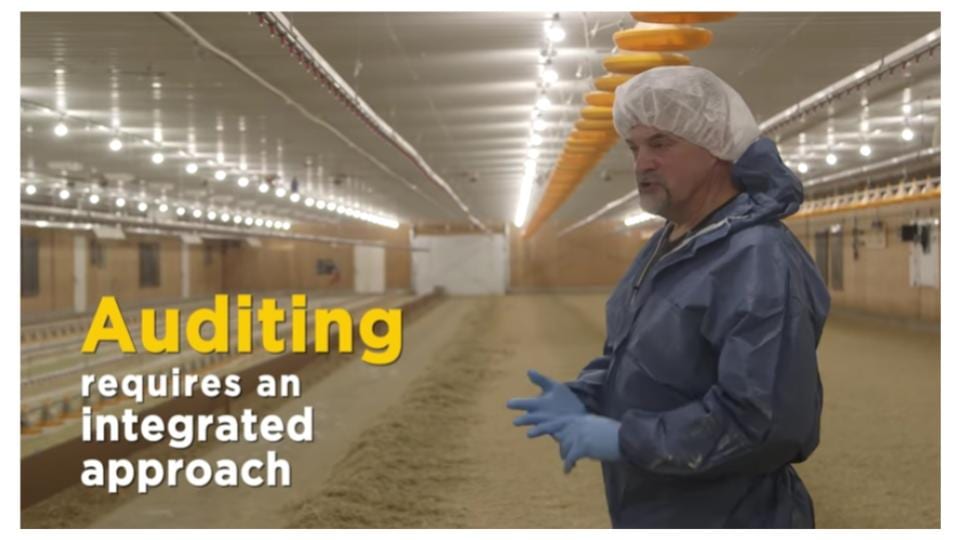
He instills the importance a well-rounded evaluation of the brooder barn environment.
For this, he uses the acronym FLAWSS:

…which means:

Anything that your brooders could come into contact with – COUNTS.
“Because no barn is the same”, Scott exclaims.
Everything down to the shavings on the floor will influence the comfort of your brooders.
Have microscopic attention to detail and a critical eye for every parameter.
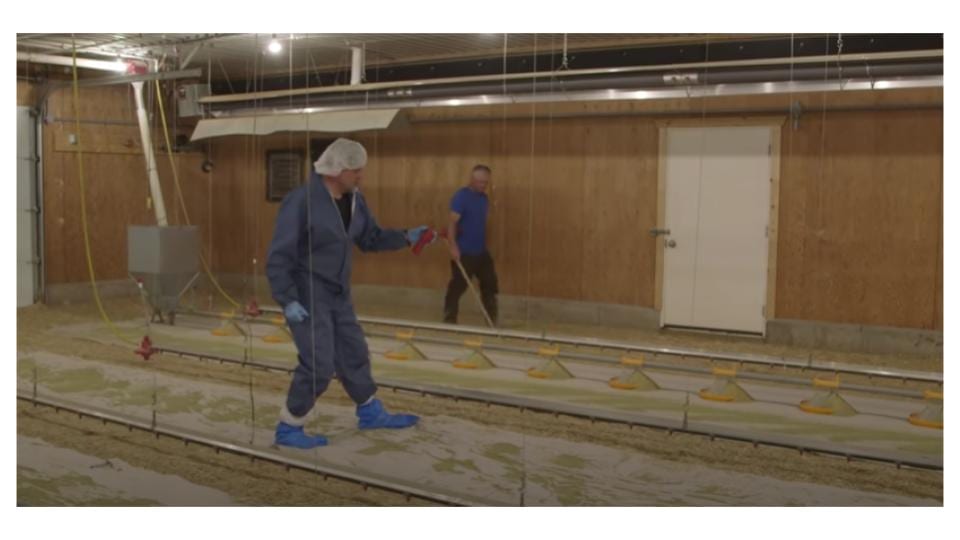
7. Brooder feed
Brooder feed is a key parameter to get right for obvious reason.
If the chicks have trouble finding or accessing their feed, then they lose valuable input.
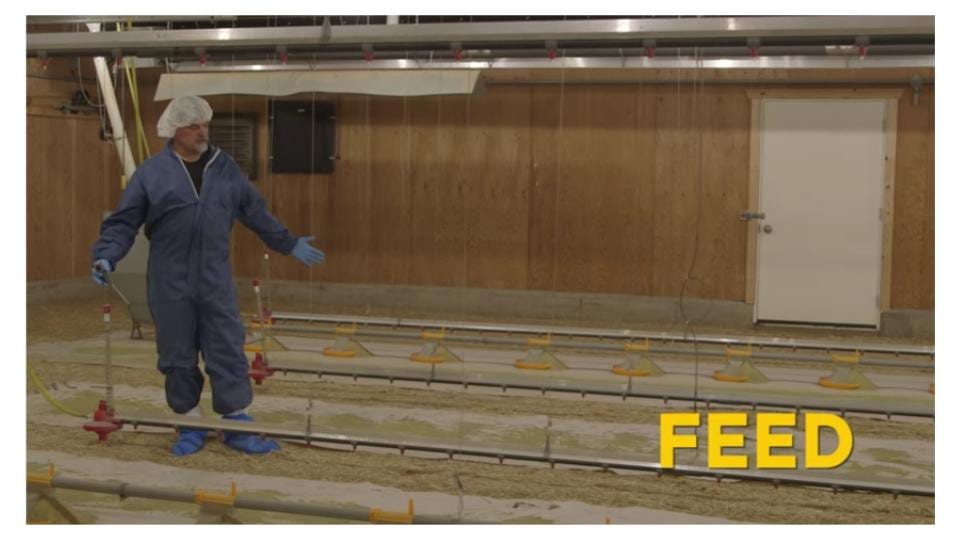
Scott advises that about 50-70% of the brooding space should be covered with paper.
Why?
To provide a little insulation for the chicks against the coarseness of the shavings of the floor litter,
But also as a neat and tidy surface for the chicks to feed on.
Now, for the amount of feed…

Scott recommends you allocate 40-50g of feed per chick.
Pro tip:
What’s critical is also that you divide the allocation between feed in the satellite feeders sitting on the litter,
As well as the feed on the paper.
Scott quotes researcher guidelines that state chicks feed best when they are presented with crumb size and texture of 2-3mm.
Shallow pans also for easy access helps the chicks settle in and feed well.
8. Brooder lighting
Lighting in this particular barn is 10ft above the floor.
But it’s ALL about the light intensity (not the style or set up of lighting).
For example, LED lighting is quite bright in intensity compared with conventional light bulbs.

Scott insists, “…when you start chicks you want a bright light, good intensity.”
(About 2 lux is optimal for the first 3 days from arrival.)
And on the flip side, a session of putting the lights out helps the chicks get good quality sleep and rest for optimal growth.

9. Climate conditions
Climate quality matters greatly when rearing brooder.
ChIcks reared under optimal air quality, temperature, the humidity will prosper.
Scott advocates using a CO2 and humidity detection meter, a bit like this one…

This will indicate if you have adequate barn ventilation. (A key component to maximising broiler weight gain.)
In the case of this barn, CO2 is just right and the grower might put on the mist sprayers for a little more air moisture.
Here are the complete climate recommendations for your brooder barn:

Now, for heat.
When your heaters are on, you should make sure your spot brooding set up has an even distribution and coverage of 90-degrees F (33-degrees C).
Here’s Scott doing exactly that:

10. Water
Water delivery and quality are vital to brooder management success.
If you are using water lines, get them flushed a few hours before the arrival of your chicks.
This removes all air pockets from the piping, giving a more ready flow.

Also, Scott advises you activate the nipples a little bit before arrival:

This gets the nipples bearing tiny glistening droplets of water.

Why is this important?
For inviting the chicks to drink immediately.
Also, what encourages the chicks to drink asap is setting the drinks to the ‘eye height’ of the chicks:
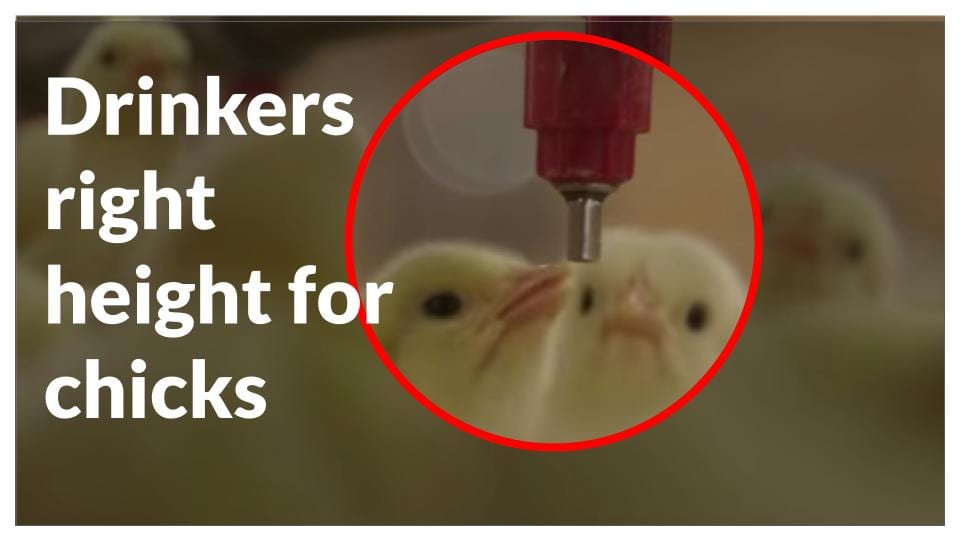
The aim here for EVERY grower is to facilitate their barn mimicking the hatchery environment.
(Keeping the birds comfortable and familiar with their new home.)
11. Chicks can’t thermoregulate
Chicks are physically unable to adjust their body temperature for the first 4 days of life.
Therefore they are completely dependent upon your ability to control their barn environment.
You have to get it right.
But a clue will be…
Behaviour changes among the flock in response to the temperature gradient in the barn.
Huddling is one common occurrence:
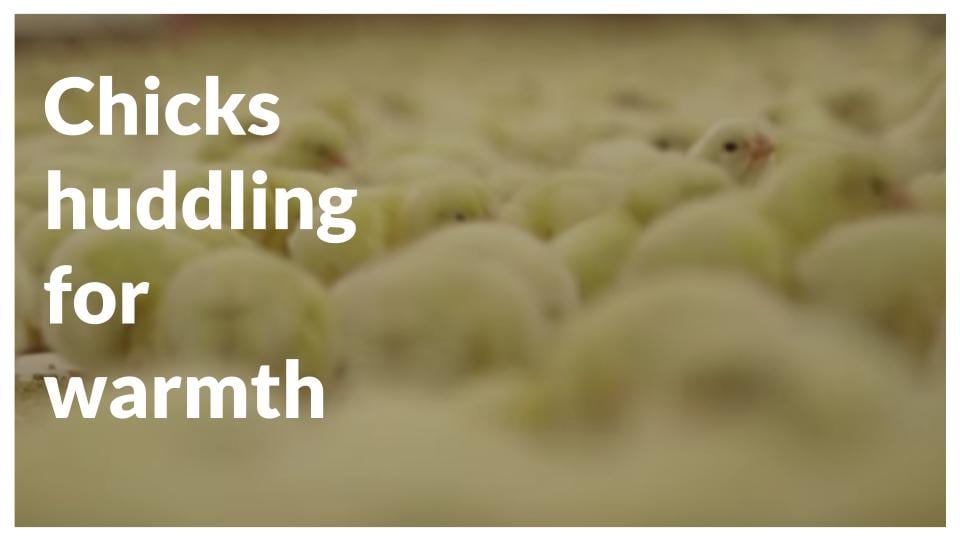
Here’s a summary of what you might see your flock doing in response to barn temperature…
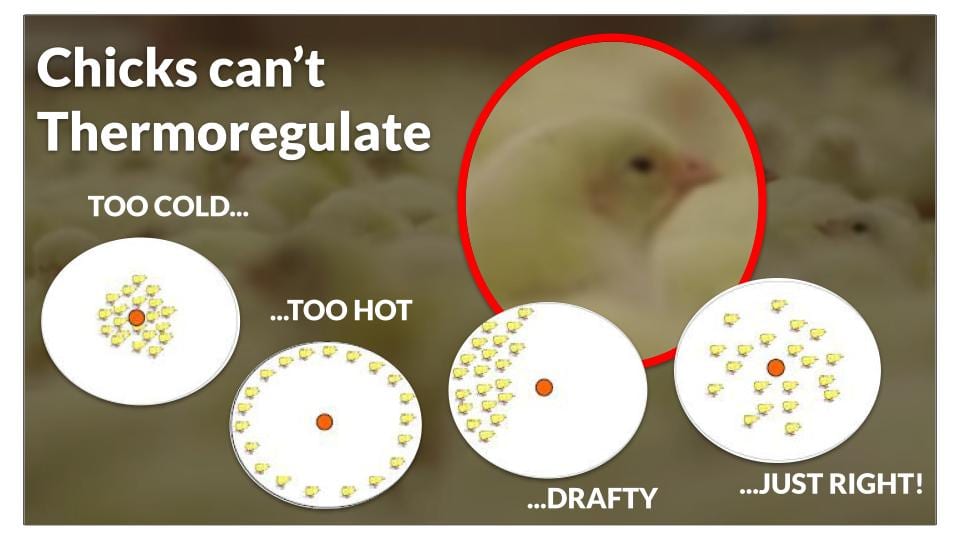
(Source of illustrations: https://extension.unh.edu/resource/brooding-and-caring-chicks)
Preparation of the brooding chamber goes a long way to ensuring the health and welfare of the chicks.
12. Space and sanitation
You must provide adequate capacity for your birds to move freely and “…find a comfort zone for feed and water.”, according to Scott.
Keeping the barn clean and spotless for the enjoyment of the chicks is critical.

Provide a barn set up that suits the flock size and caters to every area of sensitivity felt by the chicks.
Farming removes the bond of chicks with the mother hen.
So, we must step into the natural gap left behind with compassion:
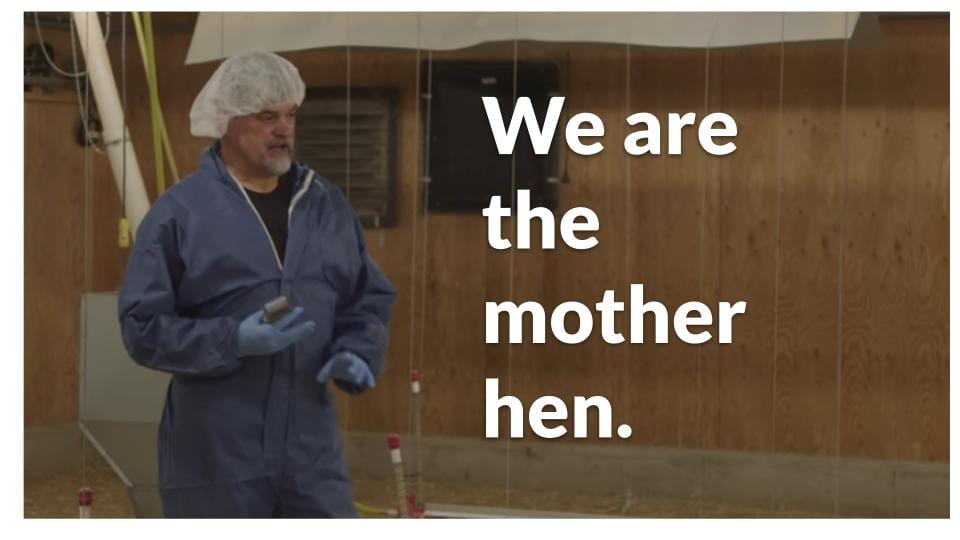
Scott says that we (the farming professionals) are responsible for providing that ideal “brooding chamber”.
It’s got to have optimal heat, feed, lighting etc. to get the chicks feeding and drinking regularly.
Without this, they lose vital growth input.
And so our occupation brooder managers is a non-stop process:
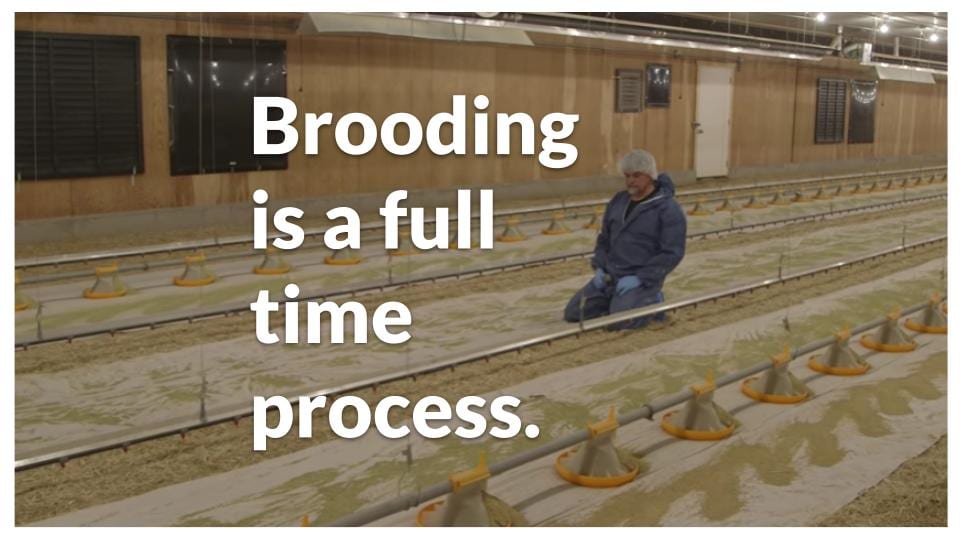
Scott points out the constant need for readjusting the set-up to fine-tune the comfort zone of the chicks.
EVERY 2 hours, he recommends your stockman checks in on things,

With a view to applying the necessary tweaks.
And when the chicks arrive, they’ll tell you by their behavioural response to the barn – if they are comfortable enough.
How can you tell?
Scott outlines a quick guide:
By a general yardstick, this rule will give you a sense of if you got things right in the barn, or not.
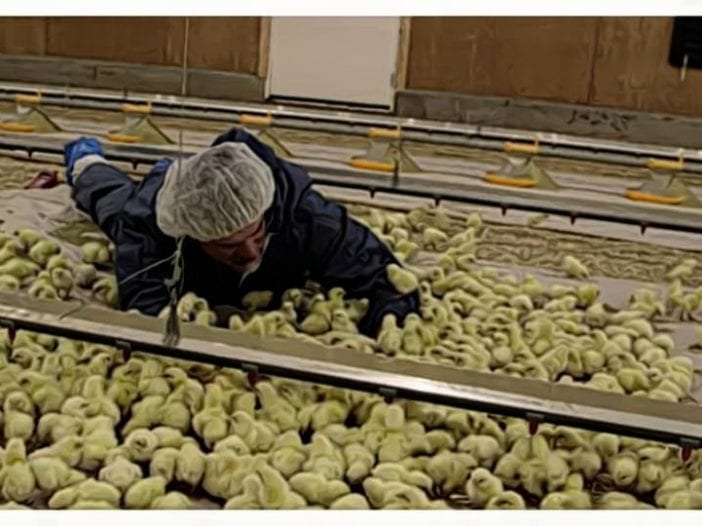
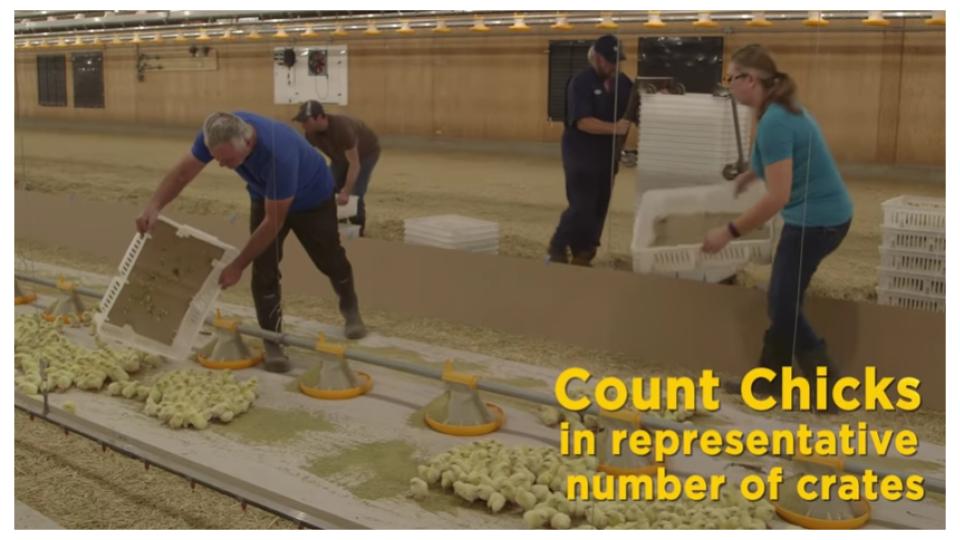
13. Arrival of chicks
Now, the time has come for your chicks to arrive on-site.

The transport docks in and the crates are being unloaded with great care, but a little haste.

You must get the chicks into the brooding chamber ASAP.
It’s time to pour out the chicks…
*Remember to count your chicks in each crate, beforehand for completeness of your records.
Handled with care, all is well with your new flock.
14. Check the temperature of the chicks
In this example, Scott examines chicks at random still in the crates before they are released.

The ideal vent temperature should between 103-105 degrees F (39.5 – 40.5-degrees C).
Also, examine the beak, eyes and navel for healing, legs have an elastic tone without any red hocks or marks…
…these are all signs for determining chick welfare on arrival.
Scott recommends taking the temperature of individual chicks in clusters of 5 making your way down the barn…
…once or twice a day for the first 4-5 days.
15. Weigh your chicks
A very important part of broiler brooder management is the weighing of chicks.
There are several bottom-line benefits to this, one of which is hatchery feedback.
Letting your value chain partners and suppliers know that their stock was good, or otherwise.
And how about our early targets?
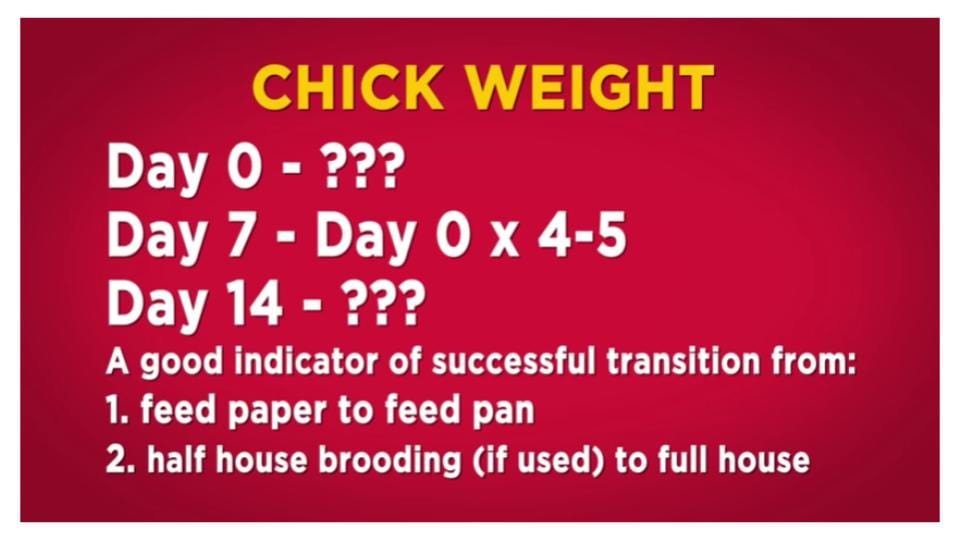
If chick weight is on target, this will indicate they are ready for the pan feeders and to occupy the full house.
We measure average, randomised weight and what we want to see statistically is a normal (bell curve) distribution graph or weights.
High uniformity is our goal.
Something like 40g per chick with +/-4g on either side.
We want 4-5 times the bodyweight at day 7 e.g. 160+ grams.
To weigh a chick, tare the scale to make sure it is zeroed out and calibrated correctly.
Then place the chick in a paper cup to keep it contained. Then simply, weigh…
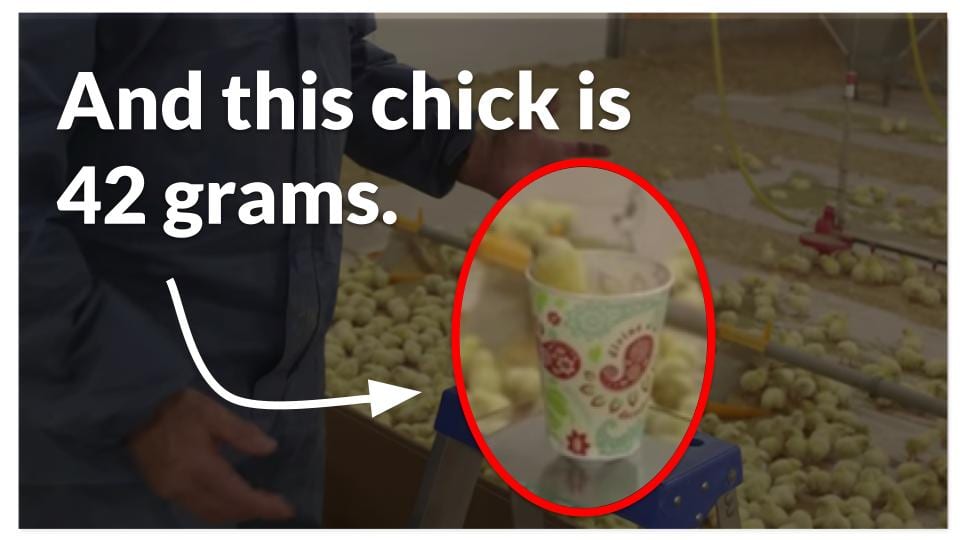
“…this chick is 42g”, says Scott.
16. Crop fill
A very, very important tool in the brooder management process.
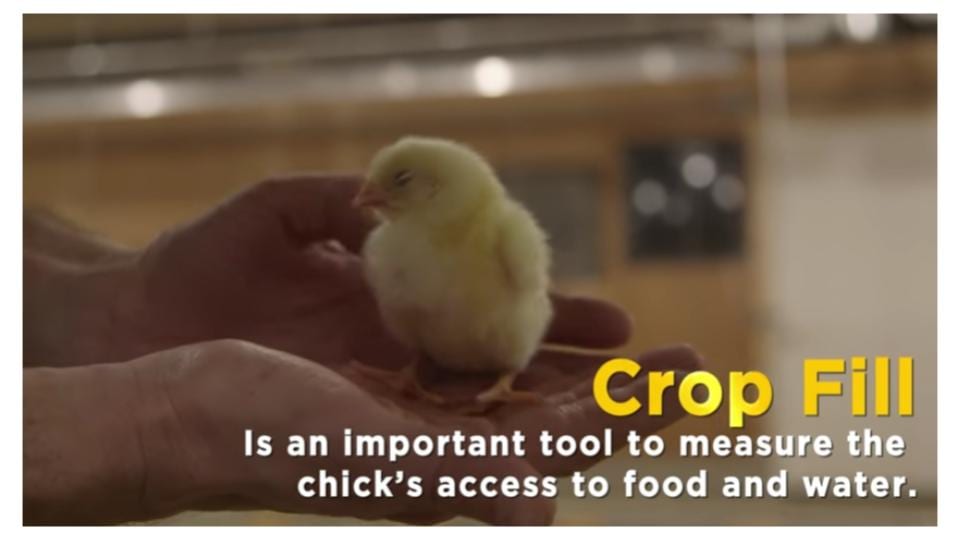
But what is crop fill?
“The little storage chamber that the birds can store feed in before it goes through the stomach and the intestines…“, explains Scott.
A chicken will feed approximately every 4 hours.
2+ hours after arrival at your farm is when you begin taking stock of crop fill. It should be about 60% at this stage.
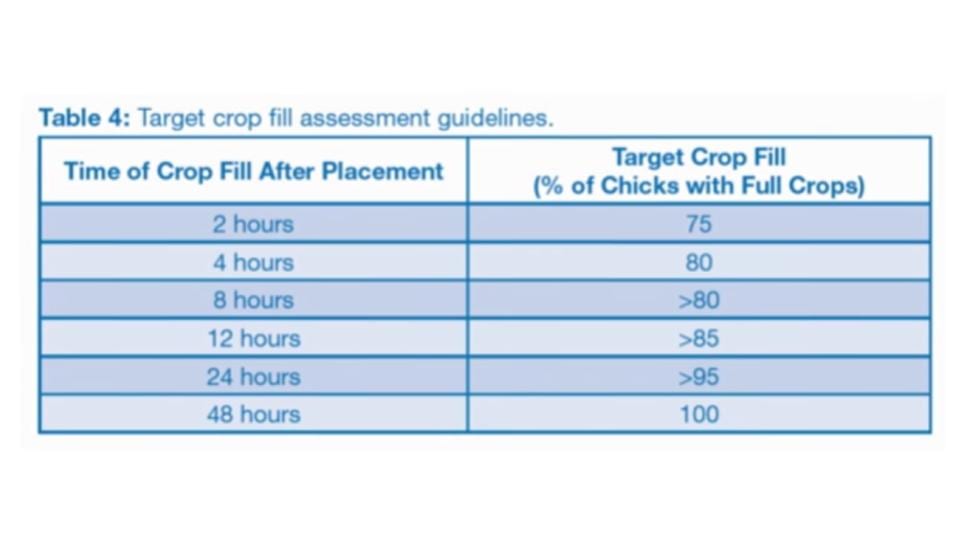
This way you monitor how well they are adapting to your barn environment.
After a day, you should shoot for 95-100% crop fill.
Pro tip: make sure you sample chicks from various locations in the barn. This will help you gather a broader view on crop fill.
Also, check for crop texture.

Pro tip: feed plus water should feel like soft porridge or oatmeal. This is what a full crop should also feel like. However, a texture of hard shavings or straw would indicate the chicks are eating litter and not feed.
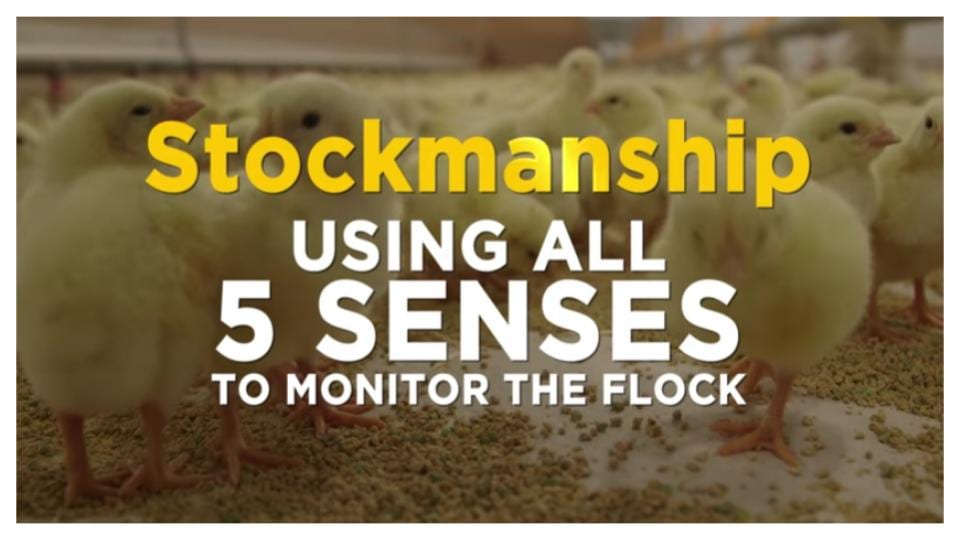
17. Stockmanship
Use all five senses as you evaluate the comfort of chicks and their barn conditions.
Seeing how they disperse, smelling the air for clues (like yolk sac infection), listening for loud fans – for example, feeling for signs…
For example,
Check the feet of your chicks to see if they are cold.
No…
…really…

See! I told you.
Get immersed.
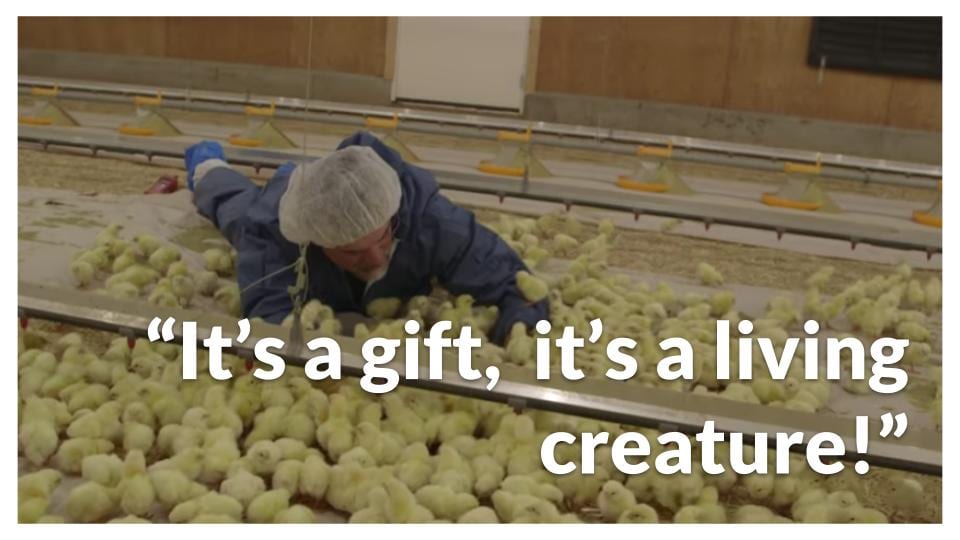
Seek a real feel for your chick’s new environment.
Stockmanship begins first with bird behaviour and then, we get into management, which involves:
e.g. raising the water lines, changing the fan speeds or putting more feed down.
“But stockmanship is critical”, Scott affirms.
Only then do you get success.
What does brooder management success really look like?
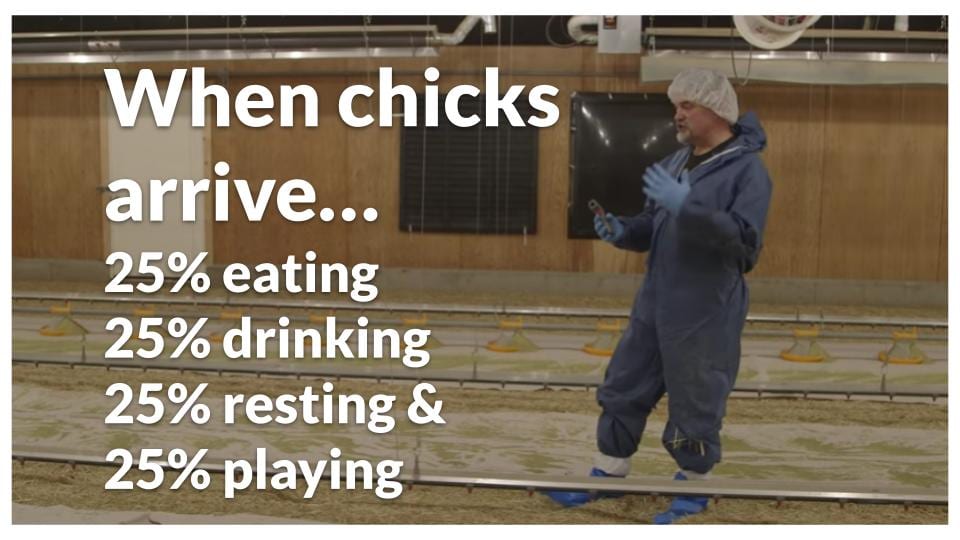
Within only 15 minutes of coming off the truck, Scott’s chicks are already:
- eating
- drinking
- searching
“…it’s fantastic!”, Scott beams with gladness.

“This is a brooding chamber….this is what we want!”
18. Data collection and keeping mortality under control
Chick mortality is inevitable.
It will happen.
But how should we evaluate if what we are seeing is normal?
Scott suggests examining the birds that die for signs that could lead back to the barn conditions.

5 D’s will keep you well informed of whether you have any underlying problems.
So, what is a regular pattern of mortality?

Once you get over the hump of the initial peak in mortality (reaching a maximum by day 4),
Your daily mortality rate should start to subside and completely tail off by day 7.
As a gauge, it should tell you where you need to focus for early-stage brooder improvement.
Either in better hatchery liaison or better practice and workflow management on the farm.
19. Want more information about this video on brooder management?
Visit ontariochicken.ca


Or, you can reach Scott directly via his LinkedIn profile.
Dr. Scott Gillingham (LinkedIn)
Now, over to you…
Are you currently researching for broiler brooder management best practices?
Are you preparing your barn to receive your 1st arrival of broiler chicks?
Either way, I’d be interested to hear from you.
Leave a Reply